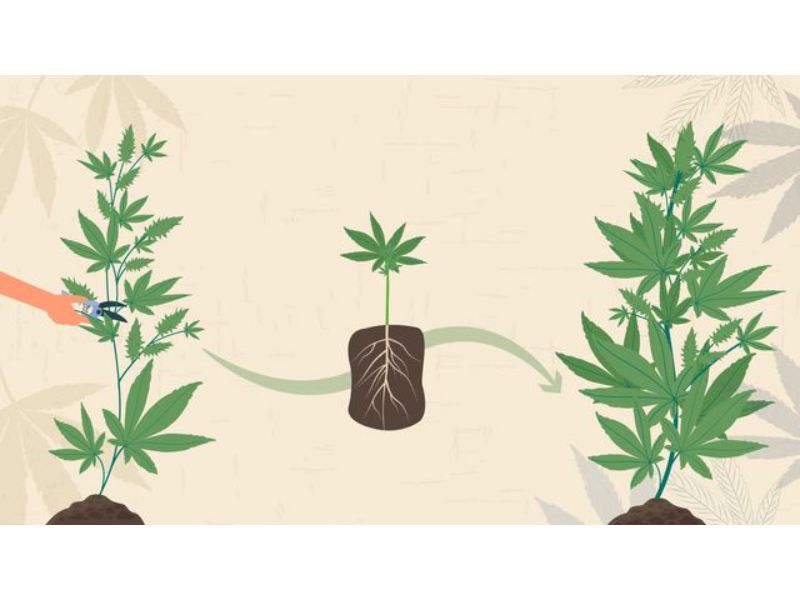
There could be many reasons for you to start cloning a plant. You want to expand your growing operation or want more plants of a certain strain. Next to that it’s also way cheaper to clone then buying lots of seeds and it’s the fastest way to reproduce cannabis.
But to get get good and healthy clones, you need to know how to clone in a proper way. In this article we’ll show you how!
Clones are genetically 100% equal to your “mother plant” that you are cloning off. They are simply a cut off branches that have grown their own roots and became a new plant. They are nothing else then a exact copy of the plant you have taken it from. So expect the same results in smell, flavor, yield and potency.
Step 1: Choosing a good mother plant
Like I told before: A clone is an exact copy of the plant that it’s cut from. Genetically, in smell and in flavor the clone will be exactly the same. This means that choosin the right mother plant is very important to get high quality clones.
Many people think growing a mother plant from a feminized seed is the way to go but they are wrong! It could work out pretty fine but there is one problem with feminized seeds: They can eventually turn out to be hermaphrodite, even after cloning.
This has to do with the feminizing process of the seed. So don’t clone from feminized seeds/plants but grow plants from normal seeds and choose the one with best phenotypes.
Next to that it’s also important to clone from a very branchy plant. This will lead to enough clones and less stress for a plant when cutting off a branch. one trick to get a branchy plant is by using a technique called: “topping” everytime after you cut off a clone. This will lead to lots of new branches that could be cloned.
Another technique you can use to get a good mother plant is called: “cropping”. This method helps your plant to get let’s of new side branches wich can be used to clone. By simply bending the main trunk of your plant very carefully
(Best to do while pinching and rolling it at the same time) you are able to get it in a 90 degrees nod without breaking it. This will lead to the side branches shoot high quickly and could become a source of fresh new clones.
Step 2: cutting off the clones
After finding the right motherplant it’s time to start cutting of your clones. The process fo doing this may take some preparation and concentration but is quite fun to do. First of all, you need some equipments:
- Rubber gloves
- Scalpel/shaving razor
- Anti-bacterial soap
- Cup of clean water
- A quiet, clean place
When cutting a cannabis plant to get clones, it’s very important to work sterile and clean. This is to prevent bacteria entering the cuts of your plant. Thats why you should wear rubber gloves and clean your Scalpel/Razor with anti-bacterial soap before you start cutting.
The best clones are the young, fresh side branches of your mother plant. The size doesn’t really matter right now but it needs to have a growing tip on top. Choose fresh, bright green branches and cut them off 2 CM under the third/fourth node from top.
When you cut the branch, make sure to cut it in a 45 Degrees angle. This way you will get a bigger surface to grow new roots out of.
Once you have your clone, you should cut off the lowest leaves as close to te branch as possible. After that you put the clone un in cup of fresh, clean water. This will prevent oxygene getting in the clones system (Wich is very bad) but also prevents your freshly made wounds from drying up.
Step 3: Rooting the clones
Till now your “clone” isn’t really a new plant and It may still look like a cut-off branch. It’s just missing one important part to become a real self-sufficient plant. Thats right: The Roots! A plant will grow it’s roots by itself but it needs the right environment and nutrients to start doing so.
Start by choosing a medium you want to grow your clone in.
This could be normal soil, Rockwhool, special clone plugs or even oxygen rich water. Then you should start wetting the medium. When using a rockwhool cube you should place your cube in water with a PH value of 5 for one night.
Rockwhool itself has a PH of 8 wich is way to basic for your clones. Other mediums can be humidified normally.
After wetting your medium it’s time to install the clones. Start with puncturing a hole in your soil, cube or clone-plug so the branch of your clone fits perfectly. Now take the clones one by one out of the water and rub them in with rooting powder beforeplanting them in your medium.
(Powder only untill the first node, So the part of the plant that’s wounded by cutting of side-leaves.) This rooting powder contains special hormones that will fasten the rooting process of your clone. This is really recommended to get healthy clones!
Step 4: Humid after care
The last step to succesfully grow your clones is also a pretty important step. Once the clone is cut and prepering to grow some solid roots it requires intensive care in the form of light and a high air humidity.
The biggest danger for clones is the fact they dry out very quickly. To avoid this you need to put them in a propagator with a transparant cover and spray them with water so it’s VERY humid in the propagator.
Vulnerability
Clones are very vulnerable. Thats why you should leave them alone and don’t check multiple times a day. Just like humans they need rest to heal and create solid roots so only open the propagator once a day to spray new water on your clones. The clones might start getting yellow but don’t worry, thats becuse they are living on their reserves and then colour changing is normal.
Lightning and temperature
Because clones are so sensitive to their environment and their metobalism works very slowly, you shouldn’t use strong and warm lightning like HPS. These are way to strong for clones, better look for TL-lightning, CFL’s or a special T-neon light. Look for a cool white colour spectrum! Also the best temperature for clones to succeed is around 26/27 Degrees celcius.

